Tempo di acquisti: abbiamo ovviamente iniziato con le componenti fondamentali del progetto: Lente, Camera di Acquisizione Astronomica e Micro Computer.
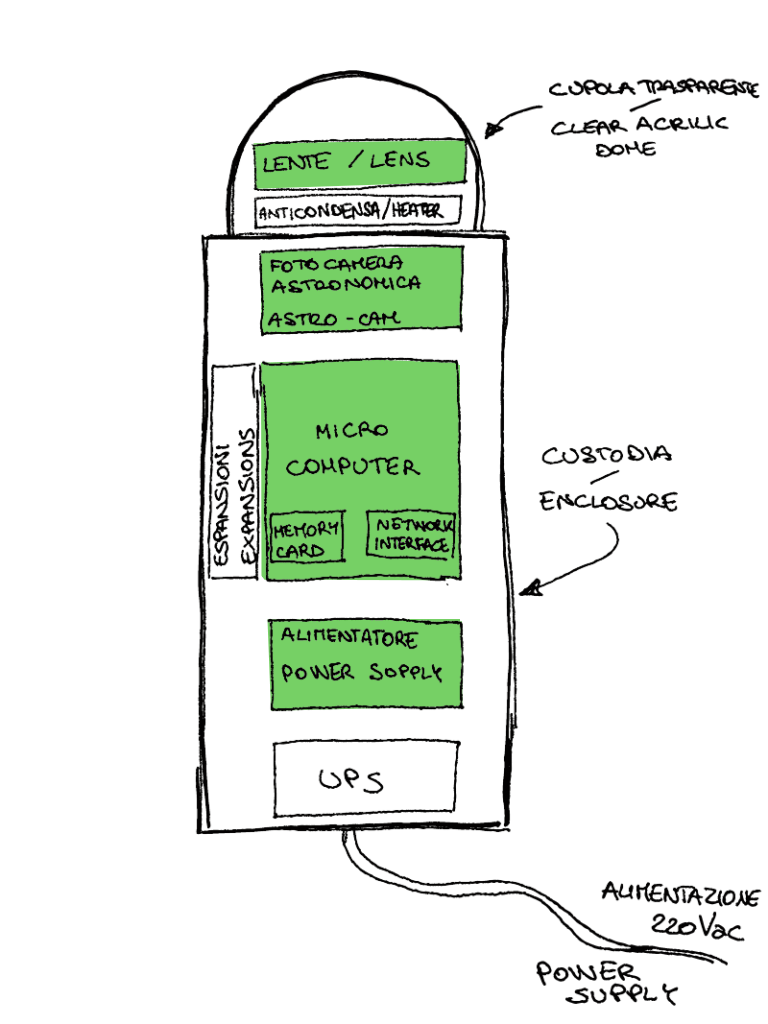
La Lente
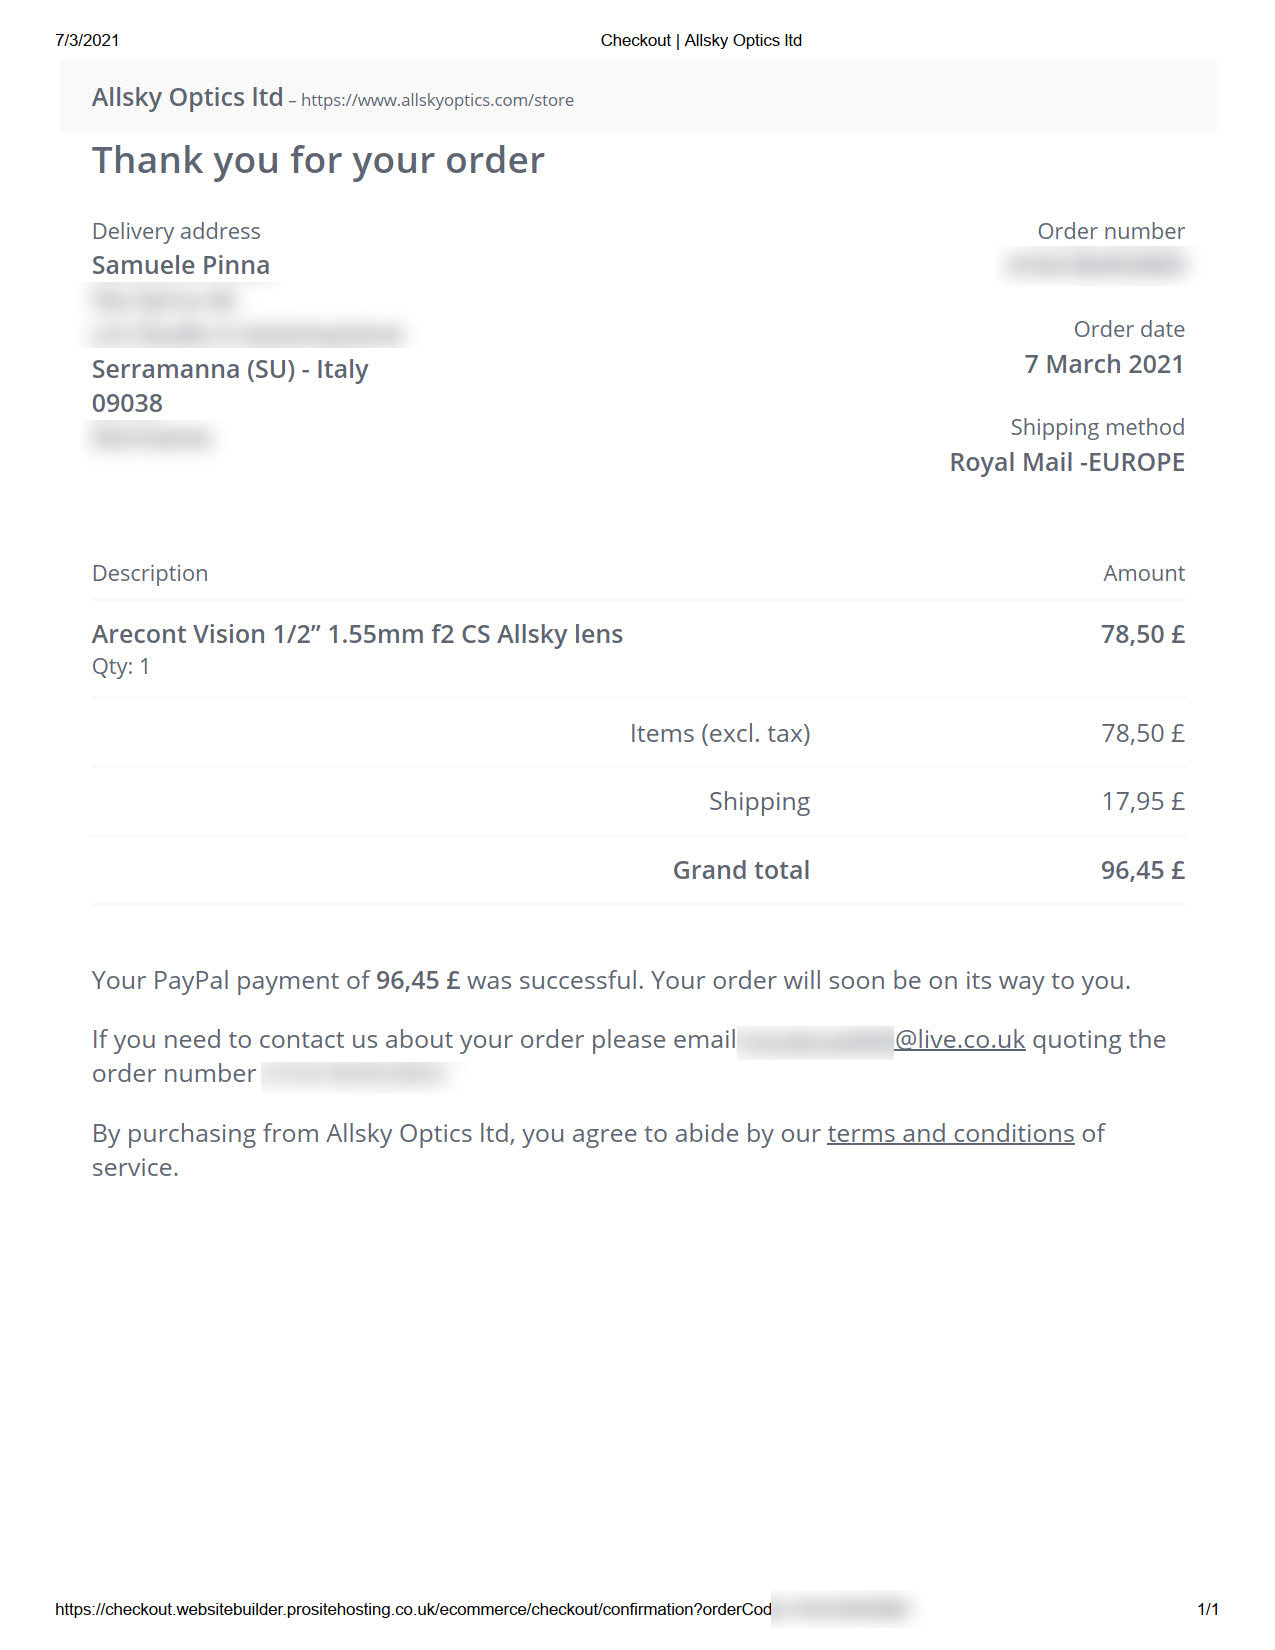
Per ottenere l’effetto grandangolare e riuscire a coprire quanto più cielo possibile abbiamo deciso di puntare sulla lente Arecont Vision 1/2” 1.55mm f2 CS. E’ costata 96,45 £ (116,81 €) e arriverà a giorni (sperando di non ricevere sorprese dalla dogana visto che l’abbiamo acquistata in UK 🙂 dannate dogane! +26,48 €).
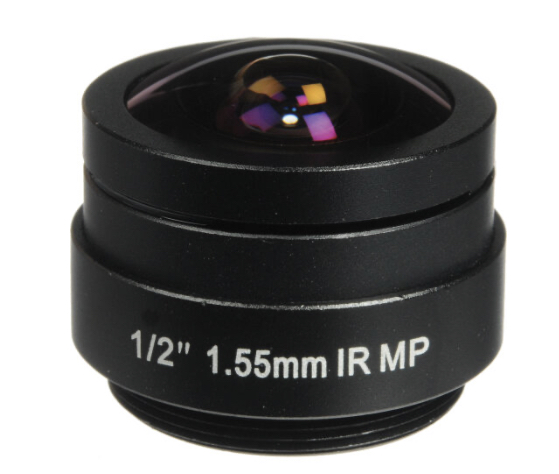
La Camera Astronomica
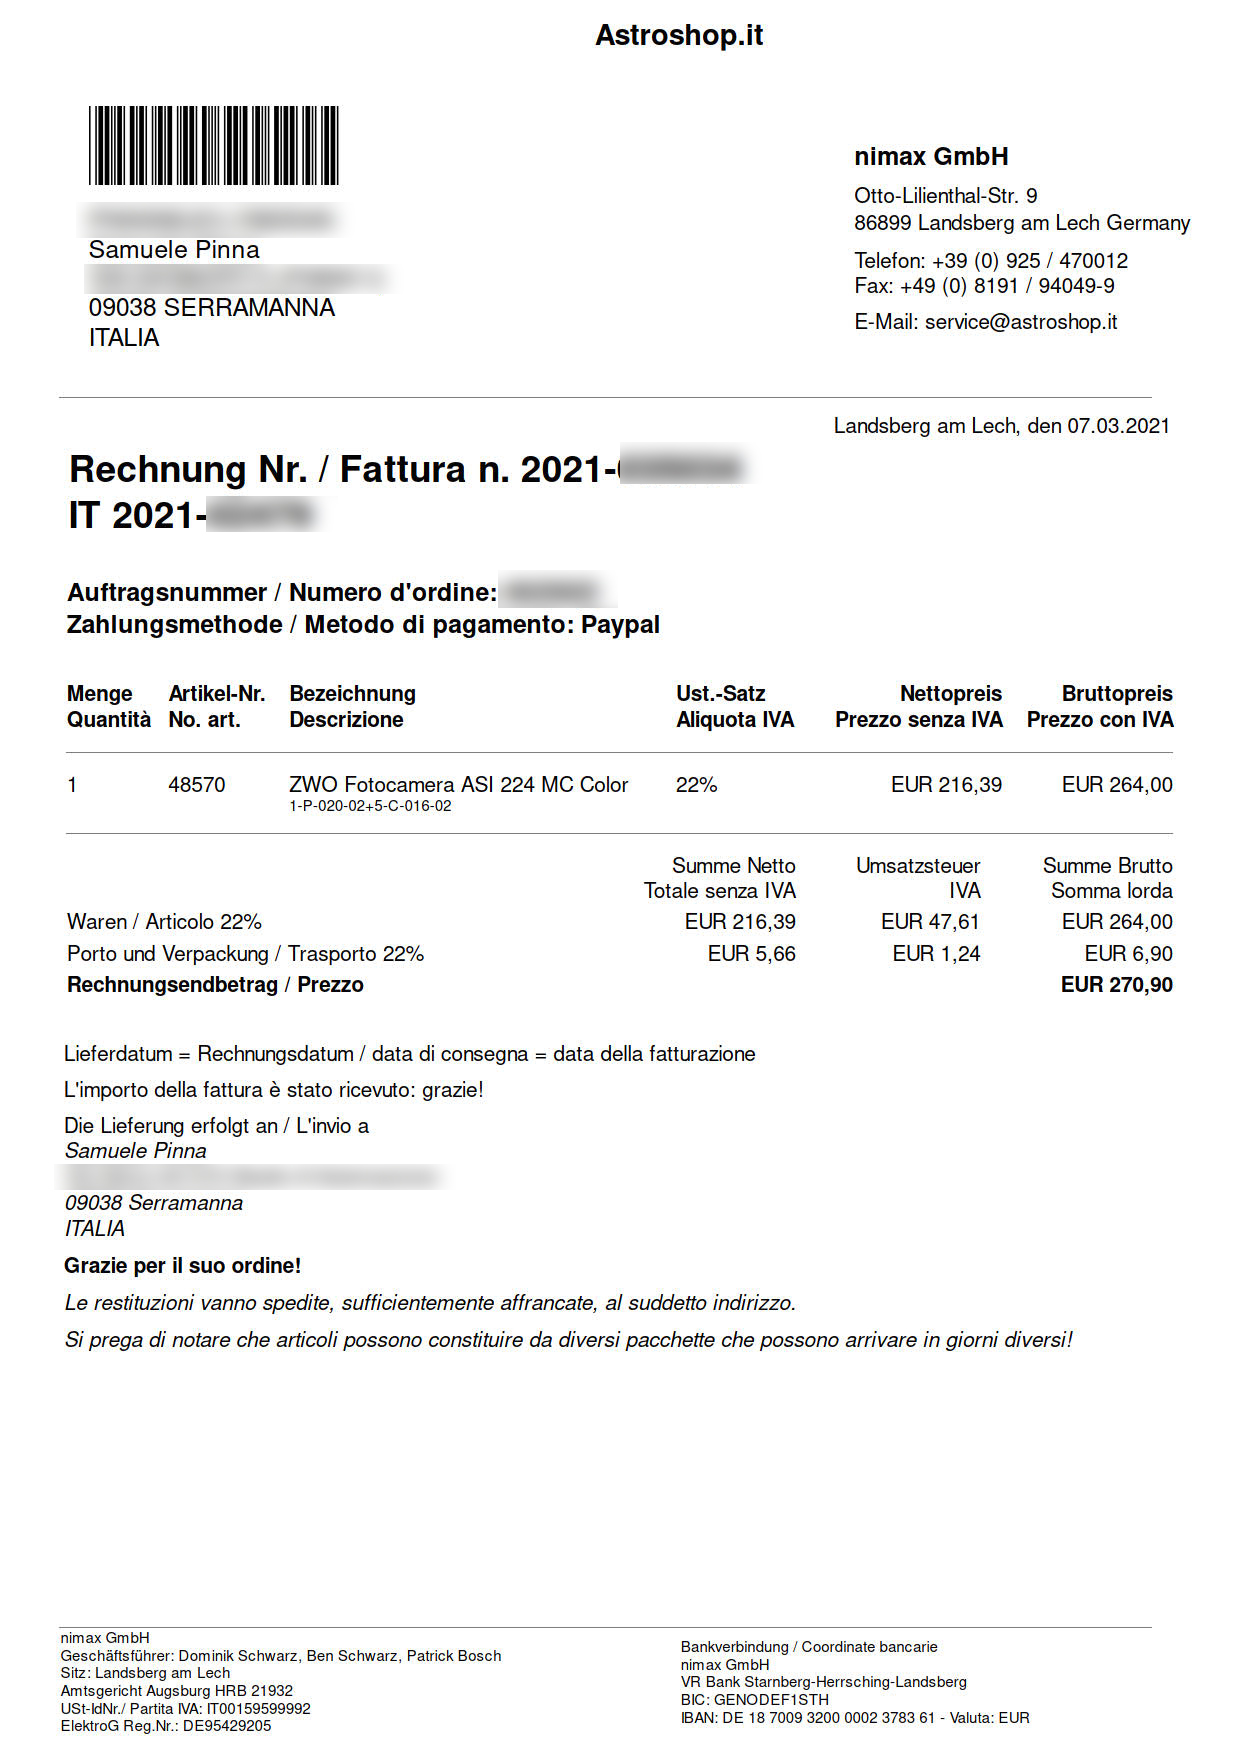
La nostra scelta è stata la ZWO ASI 224MC. Una grande camera che ci permetterà di ottenere bellissime immagini del cielo. Il suo costo è stato di 270,90 € e si… è già nelle nostre mani.
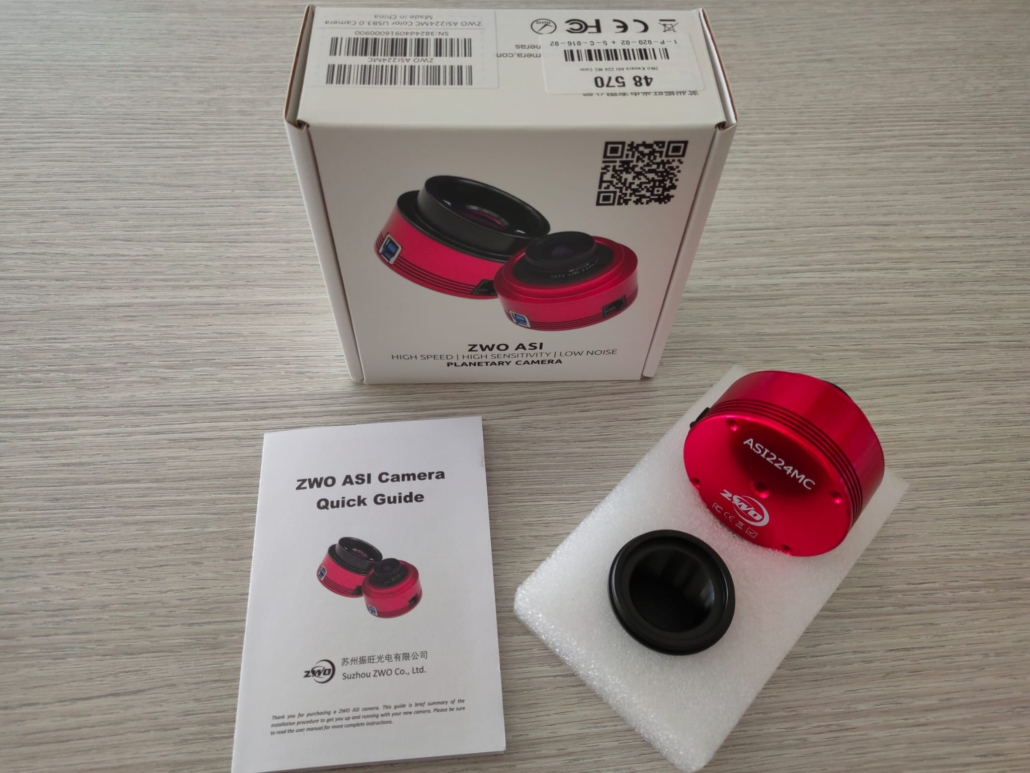
Micro Computer
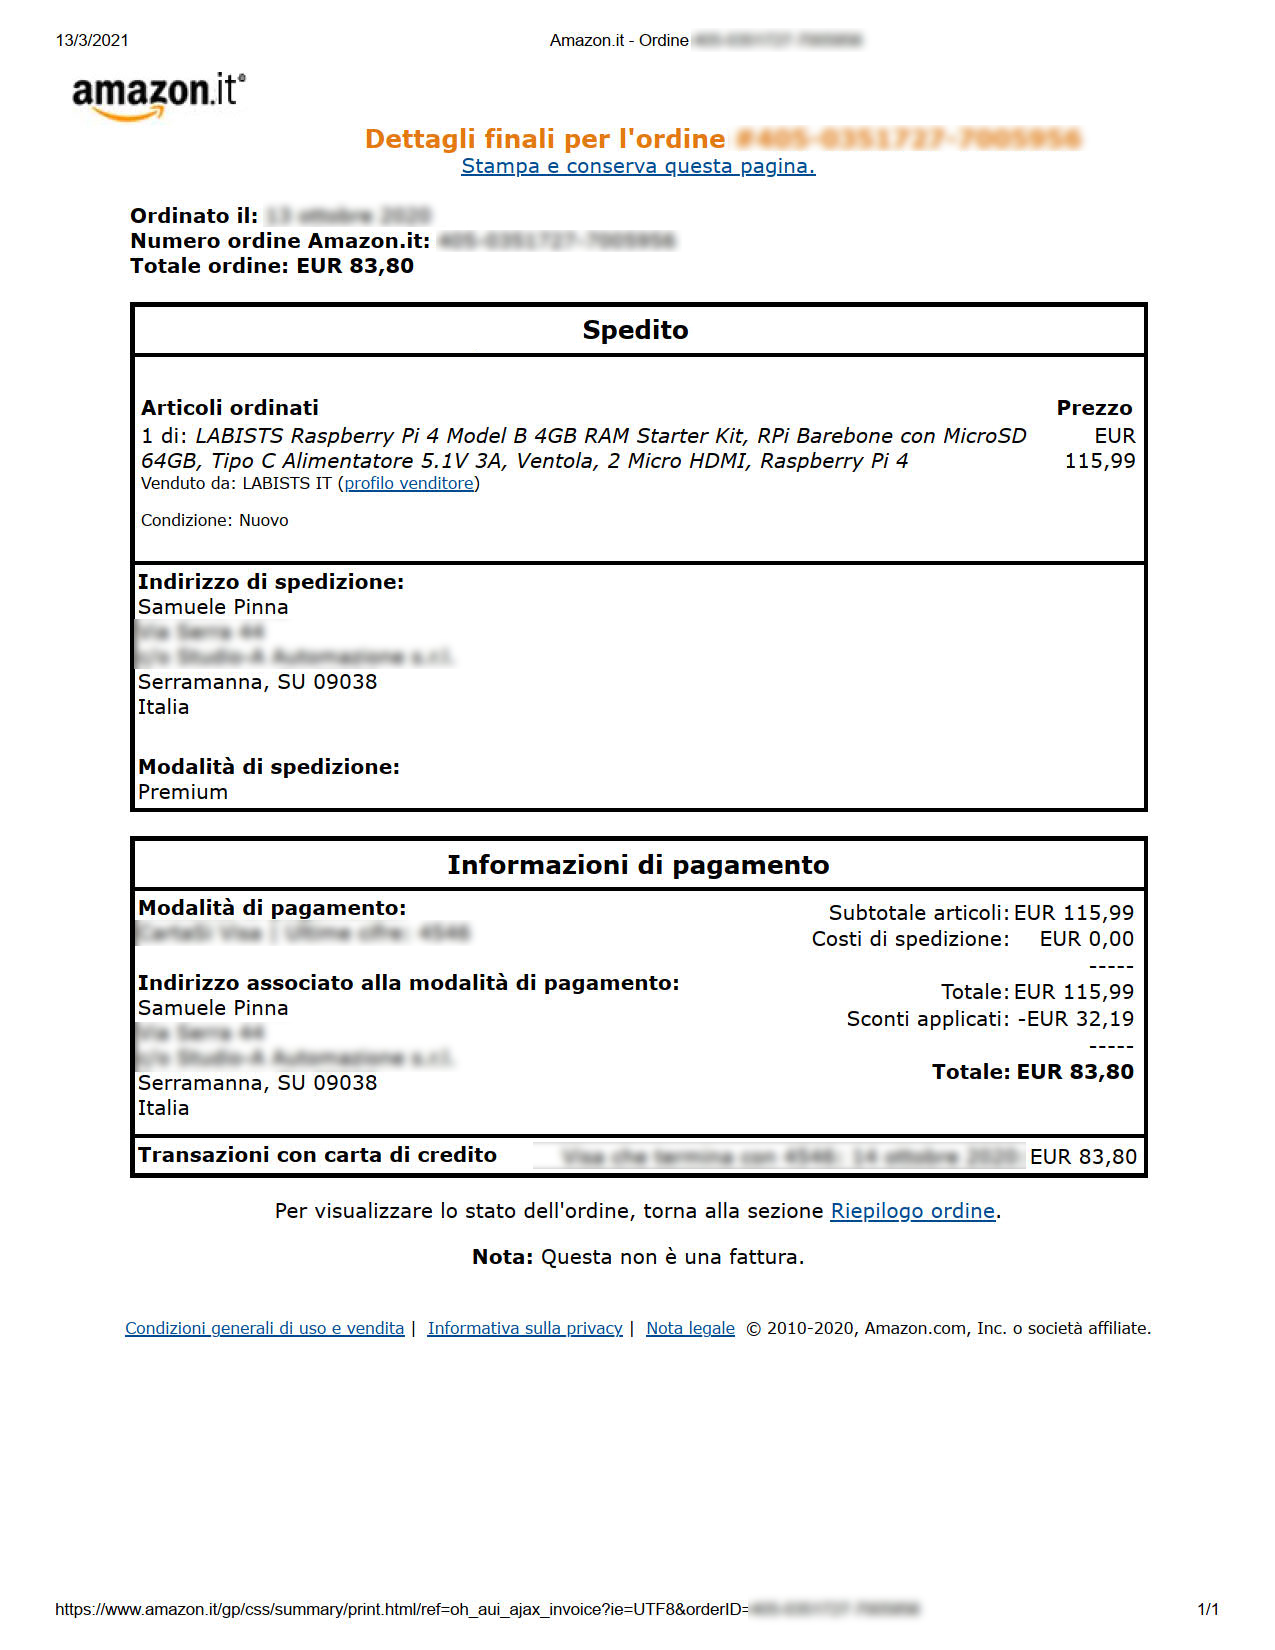
Come già anticipato abbiamo deciso di puntare su un microcomputer compatto e dalle buone prestazioni: il Raspberry Pi 4 Model B + 4GB RAM. Ne abbiamo acquistato uno sfruttando una promozione a tempo limitata per 83,80 € comprensiva di custodia, alimentatore da parete, Memory Card Sandisk da 64Gb e dissipatori.
E per ultimo ecco tutte le ricevute degli acquisti di oggi. Chi fosse interessato a conoscere l’intera situazione economica del progetto può dare un occhiata qui:

Time for the first batch of buys. We started with the main important components of the project: Lens, Astronomical Camera and Micro Computer.

The Lens
To obtain an fisheye effect and to cover all the skydome our choiche goes to Arecont Vision 1/2” 1.55mm f2 CS allsky lens. It costed 96,45 £ (116,81 €) and we will receive it in some days (hoping for no surprises from customs 🙂 damn customs! + 26,48 €).

The Astronomical Camera
Finally we decided to goes right to ZWO ASI 224MC Camera. A great camera which will allow us to obtain great sky images. It costed 270,90 € and yes, it’s already in our hands.

Micro Computer
As already said our choice fell on a compact, high-performance and economical microcomputer: the Raspberry Pi 4 Model B + 4GB RAM. We bought one with a time limited offer for 83,80 € in total and it comes with its case protection, power supply, sandisk 64Gb Memory card and heat dissipators.

Power Supply
Last but not least here below all the purchase receipts (the whole project cost can be consulted here)

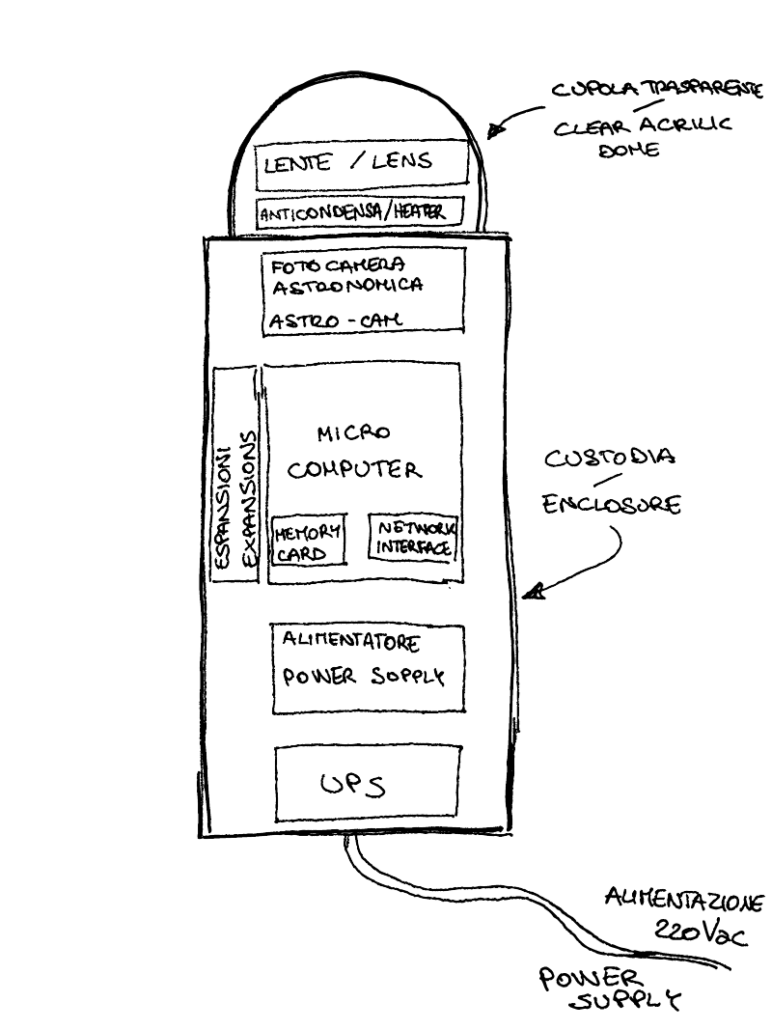
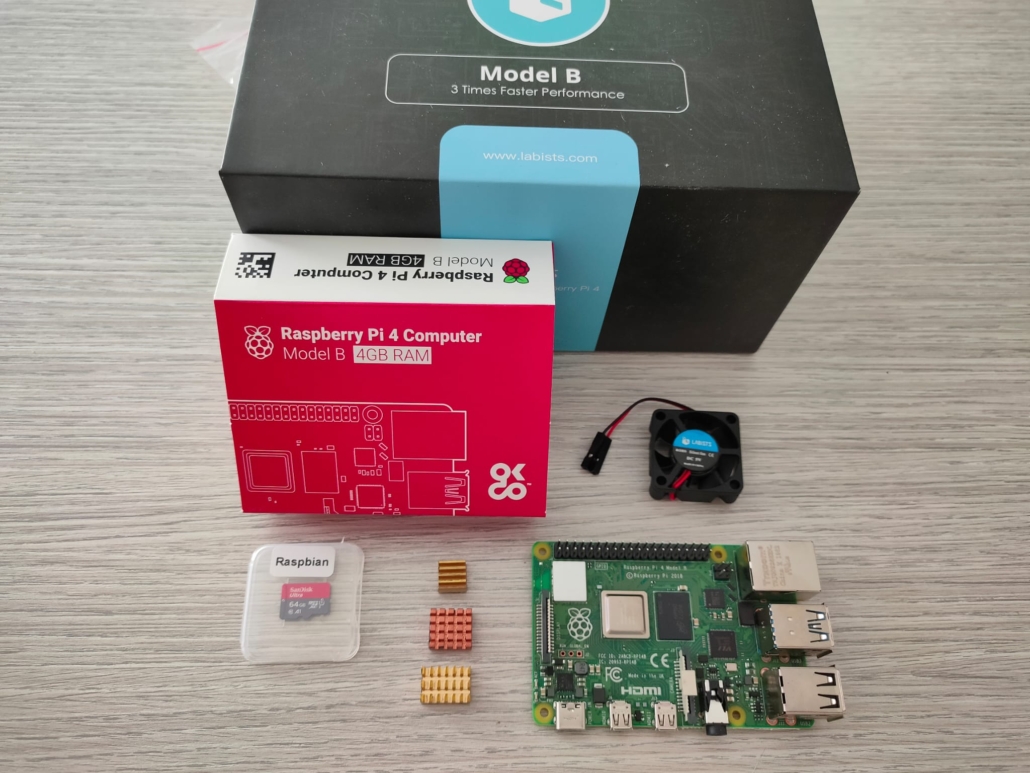
During these weeks we are proceeding identifying the components that we will purchase for the construction of the AllSky Camera: but what do we really need to make it? Here is a simple sketch that can help us.

The Lens
It is our photographic “element”, our pupil in a certain sense. The choice will go to a wide-angle and bright model to be able to convey as much light as possible to the element immediately below it.

The Astronomical Camera
All the light collected by the lens goes to our sensitive element: the camera. We will opt for a model designed specifically for astronomical photography: the ZWO ASI. The camera will transfer the datas to the “thinking head” of the ASC.

Micro Computer
Our target is to create a “stand alone” ASC without the need to connect it to a PC or laptop. Our choice fell on a compact, high-performance and economical microcomputer: the Raspberry Pi 4 equipped, among other things, with all the necessary network interfaces, wifi included, for connecting to the internet and sharing the photos and videos taken. The raspberry will also be able to acquire any additional signals for further operational expansions of the ASC.

Power Supply
We excluded the possibility of using a photovoltaic panel at this stage. We will proceed with the use of a standard 220 Vac / 5 Vdc power supply (the tipical one for smartphones). We will also try to integrate a small UPS (uninterruptible power supply / buffer battery) to ensure full operation of the ASC even in the event of a temporary power failure.

Enclosure
Having to work exposed to atmospheric agents and harsh winter temperatures (and hot summer) it will be necessary to protect all the components described above inside a rigid case equipped with a transparent dome that allows the lens to be able to shoot the sky without any problem. To prevent condensation from forming in the dome we will install a small thermal resistor. We are also evaluating the possibility of installing forced ventilation to reduce high summer temperatures without compromising the IP protection degree.

Is it clear enough? 🙂

Durante queste settimane stiamo procedendo con l’individuare le componenti che acquisteremo per la realizzazione della AllSky Camera: ma di cosa abbiamo realmente bisogno per realizzarla? Ecco che un semplice disegno può venirci in aiuto.

La Lente
È il nostro “obiettivo” fotografico, la nostra pupilla in un certo senso. La scelta andrà su un modello grandangolare e luminoso per riuscire a convogliare quanta più luce possibile all’elemento subito sotto di lei.

La Fotocamera Astronomica
Tutta la luce raccolta dalla lente viene raccolta dal nostro elemento sensibile: la fotocamera. Nello specifico opteremo per un modello pensato proprio per la fotografia astronomica: le ZWO ASI. La fotocamera andrà a riversare i dati raccolti a sua volta alla testa pensante della ASC.

Micro Computer
Volendo realizzare una ASC “stand alone” senza la necessità di collegarla ad un pc o portatile, la nostra scelta è ricaduta su un microcomputer compatto, performante ed economico: il Raspberry Pi 4 dotato tra l’altro di tutte le interfacce di rete necessarie, wifi incluso, per il collegamento alla rete internet e la condivisione delle foto e dei video realizzati. Il raspberry inoltre potrà acquisire eventuali segnali aggiuntivi per ulteriori espansioni operative della ASC.

Alimentatore
Escludendo in questa fase la possibilità di utilizzare un pannello fotovoltaico procederemo con l’utilizzo di un normalissimo alimentatore 220 Vac / 5 Vcc (quelli classici da smartphone per intenderci). Cercheremo inoltre di integrare un piccolo UPS (gruppo di continuità / batteria tampone) per assicurare piena operatività della ASC anche in caso di una temporanea assenza di energia elettrica.

Custodia
Dovendo lavorare esposti agli agenti atmosferici e alle rigide temperature invernali (e roventi estive) sarà necessario proteggere tutti i componenti descritti in precedenza all’interno di una custodia rigida dotata di una cupola trasparente che permetta all’obiettivo di poter riprendere il cielo senza alcun problema. Per evitare che nella cupola si formi condensa installeremo una piccola resistenza termica. Stiamo inoltre valutando la possibilità di installare una ventilazione forzata per abbattere le temperature elevate estive senza però compromettere il grado di protezione IP.

Questa è la nostra lista della spesa: che lo shopping abbia inizio 🙂